How to synchronize my data with Gate.io
How to synchronize my data with Gate.io and create my API key.
Step 1: Create a Gate.io API Key
⚠️ Important: Gate.io API keys are only valid for 90 days.
You will need to create a new one when it expires.
Log in to your Gate.io account.
Click on your profile photo, then go to Settings.

On the same page, open Password Management.
⚠️ Before you can create an API key, Gate.io requires you to set up a fund password.
Click Configure, then follow the required steps.
This password is mandatory for creating and managing API keys.
Once done, go back to Settings and open API Key Management.
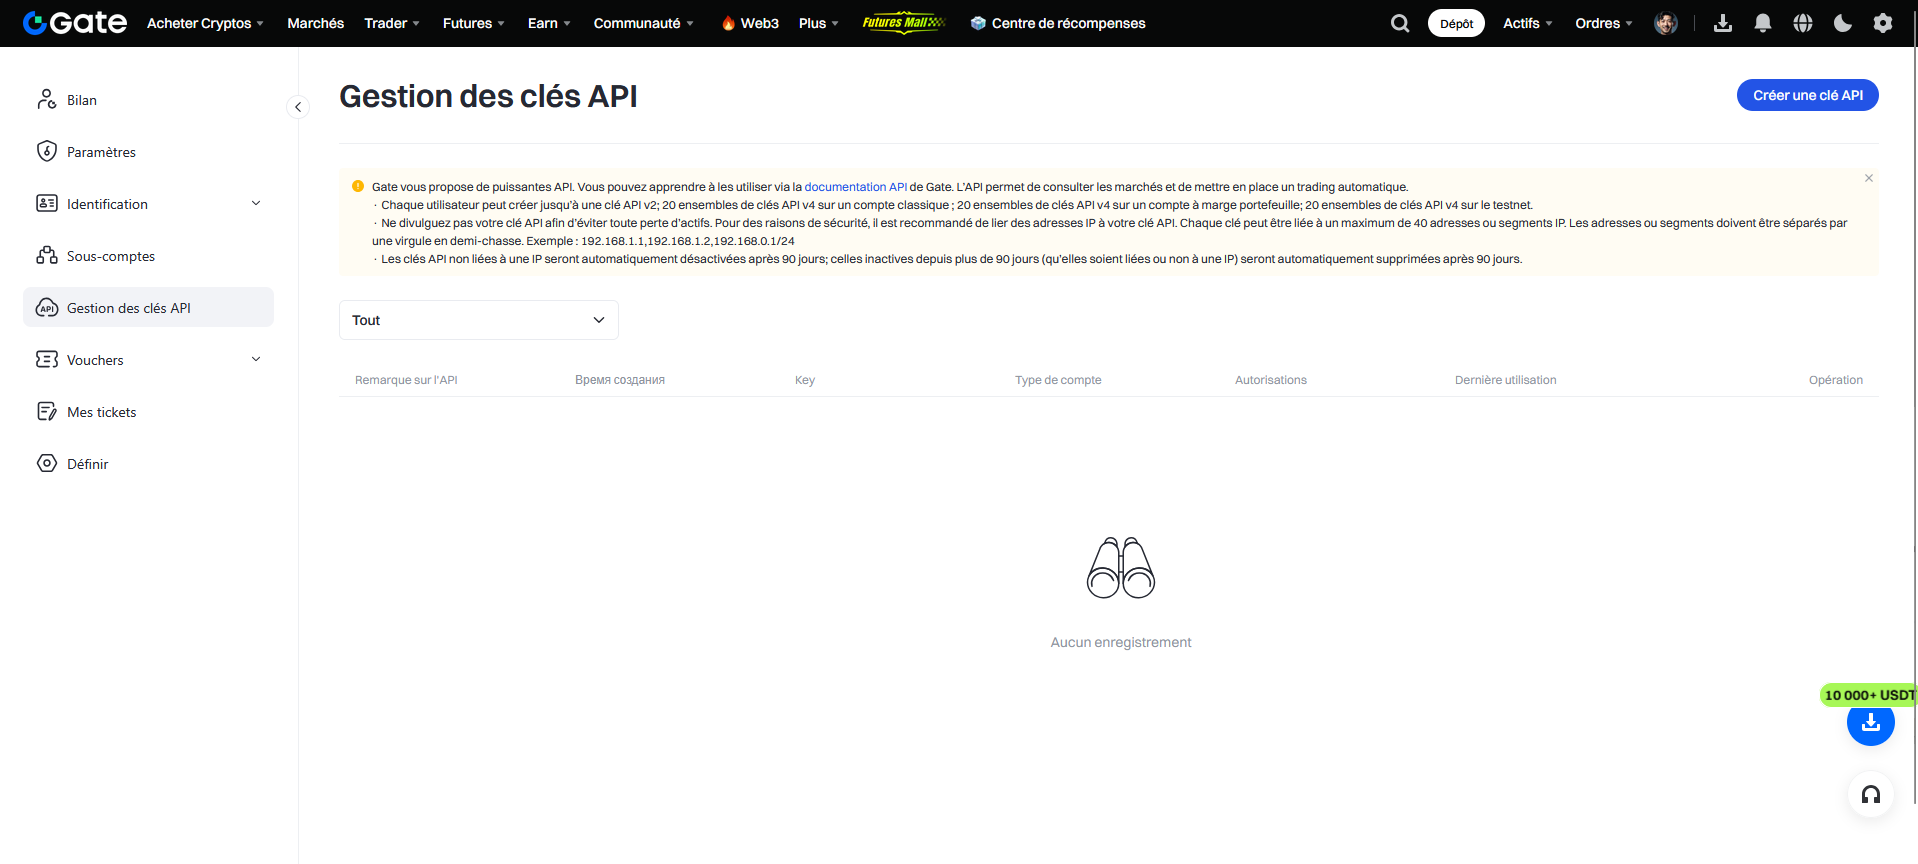 Click on Create API Key.
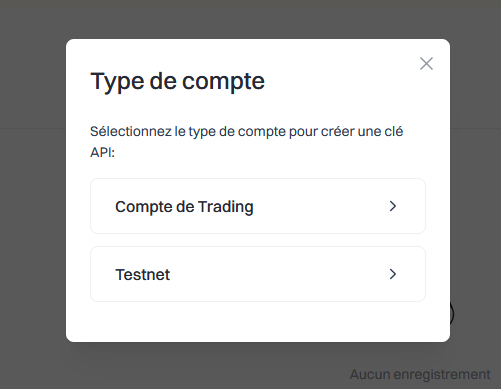
Fill in the required fields:
- Select your trading account type
- API Key Remark
Put any name you want (internal name for your key). - IP Permissions
- Bind IP or Later
→ You can enter: 37.187.134.89
- Bind IP or Later
- API Key Type
- Choose API v4 Key
Check all the categories listed, then enable Read Only mode.
Categories may include:
- Spot Trading
- Perpetual Futures
- Delivery Futures
- Earn
- Wallet
- Custody
- Withdrawal
- Options
- Sub-accounts
- Fee Details
- P2P
- Alpha
- Account
- Margin Trading (Unified Account)
- Lending
- Copy Trading
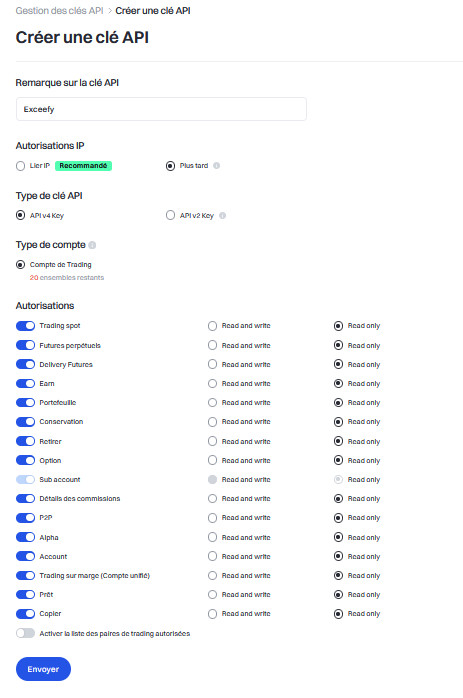
👉 Very important: even if all categories are checked, make sure “Read Only” is enabled.
This prevents any trading, withdrawal, or action on your account.
Risk Reminder
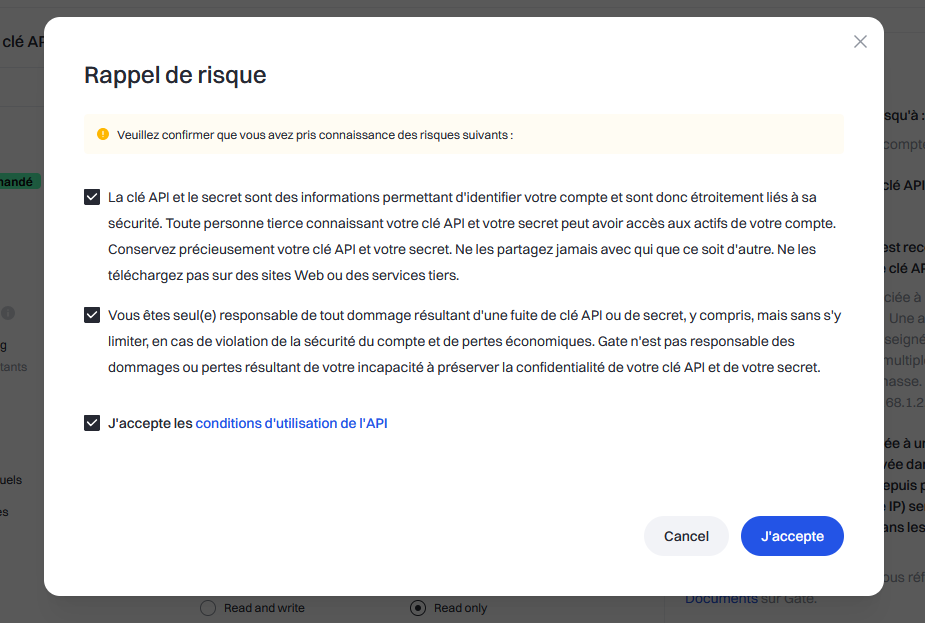
Gate.io will show a risk warning.
Read it carefully using read-only mode greatly limits potential risks.
After confirming, Gate.io will display your:
- API Key
- API Secret

Copy them you’ll need them for Exceefy.
Step 2: Add the API Key to Exceefy
Click your profile icon, then go to Settings > Wallet.
Select an existing wallet or create a new one.
Fill in the required information:
- Wallet name
- Platform: choose Gate.io
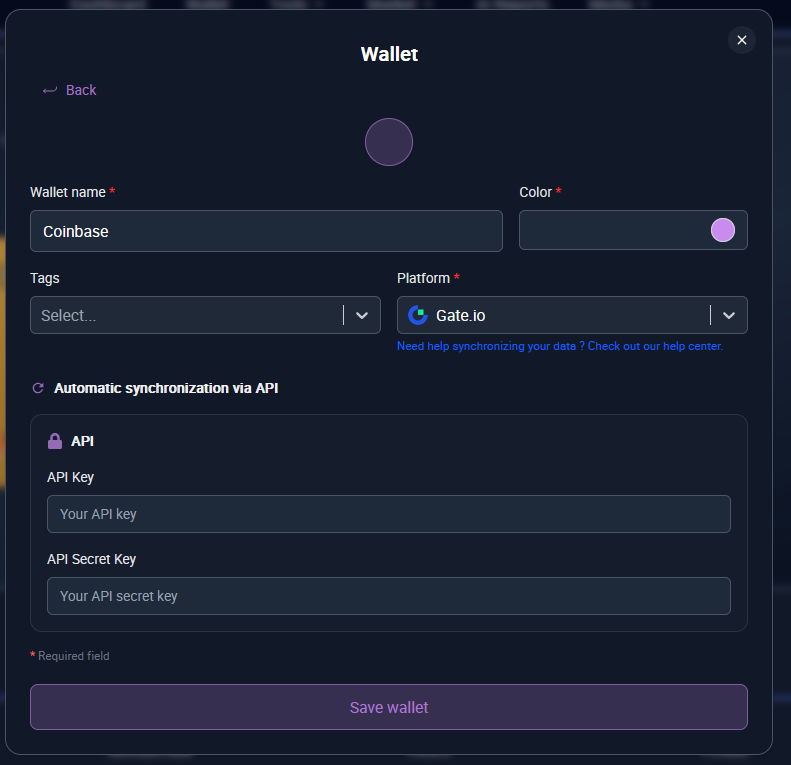
Two new fields will appear:
- API Key
- API Secret
Paste the information you copied from Gate.io.
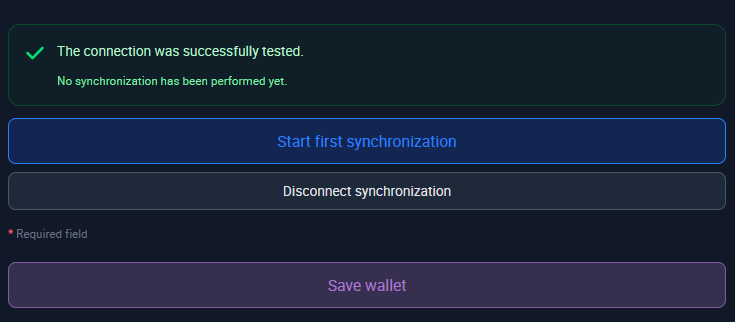
Click Save and Test.
👉 If the information is correct, two new buttons will appear:
• Start first synchronization
This launches the initial import of your transactions (may take a few minutes).
During this first sync, PRUs will not be filled in, because Gate.io does not provide cost basis data.
You will need to edit your assets manually to enter the initial PRUs.
Future transactions will be handled automatically.
You will receive a notification once the synchronization is complete.
Step 3: Transaction Tracking
Once synchronization is complete ✅, all your Gate.io transactions will be imported into Exceefy.
Future operations will also sync automatically every 24 hours.
Don't worry if you don’t immediately see your latest trades:
they will appear during the next automatic update.