How to synchronize my data with Mexc
How to synchronize my data with Mexc and create my API keys.
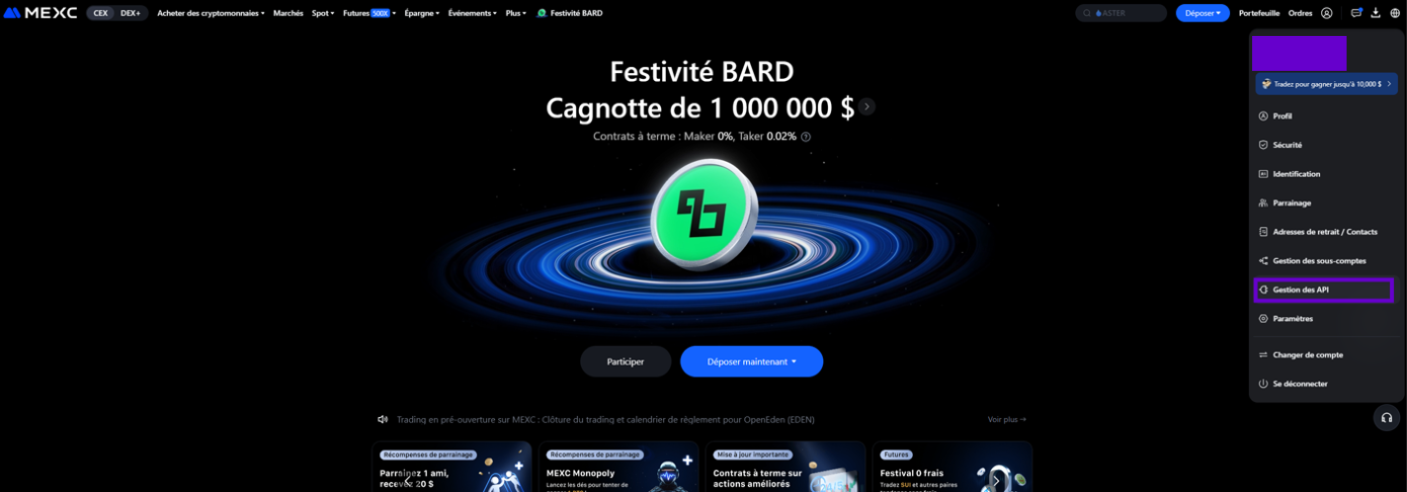
Step 1: Log in to your Mexc account
- Click on your profile picture in the top right corner, then on API Management
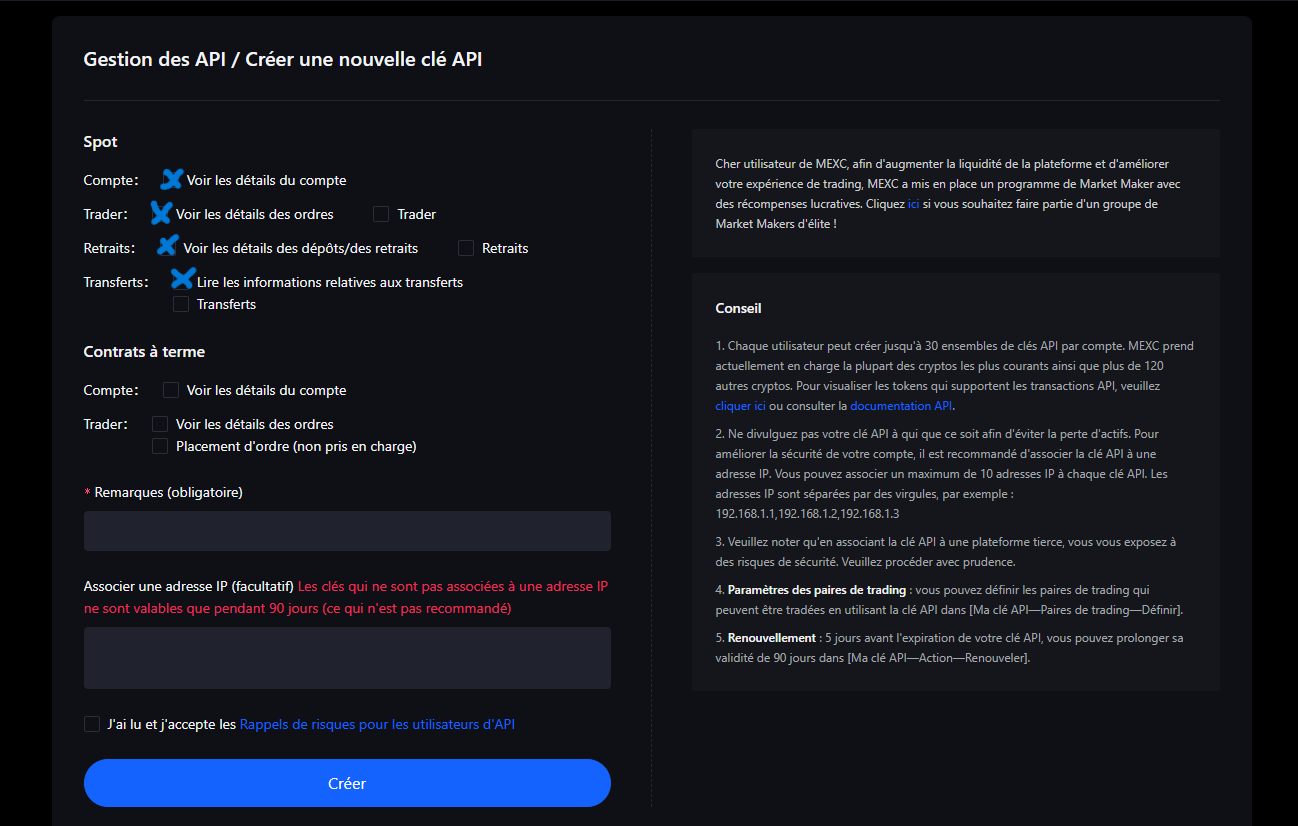
In API Management:
Check Account: View account details
Check Trader: View order details
Check Withdrawals: View deposit/withdrawal details
Check Transfers: Read transfer information
Enter the required remark (example: Exceefy API Key).
Then check I have read and agree.
Next, click the Create button.
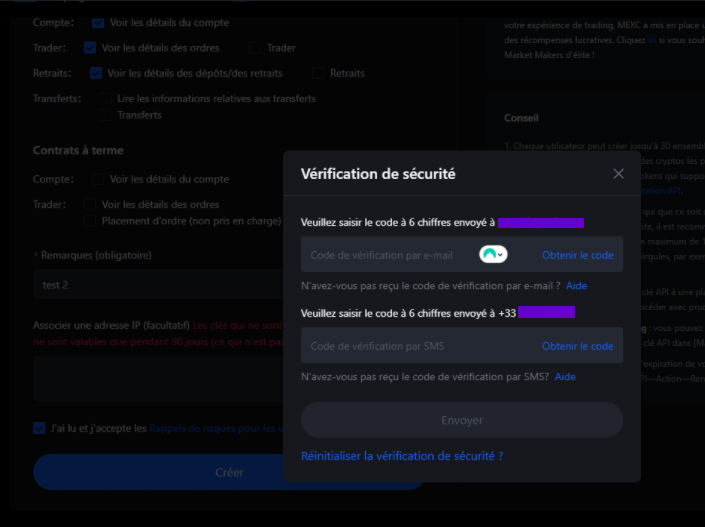
Validate the security authentications.
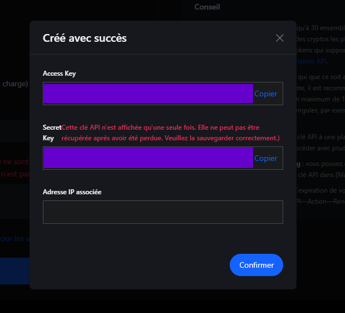
👉 A page with your Access Key and Secret Key will appear. Make sure to copy and save them carefully, as you will need to enter them in Exceefy.
Step 2: Add the API Key in Exceefy
Click on the Profile icon, then go to Settings > Wallet.
Select an existing wallet or create a new one.
Fill in the required information:
Wallet Name
Platform: choose Mexc
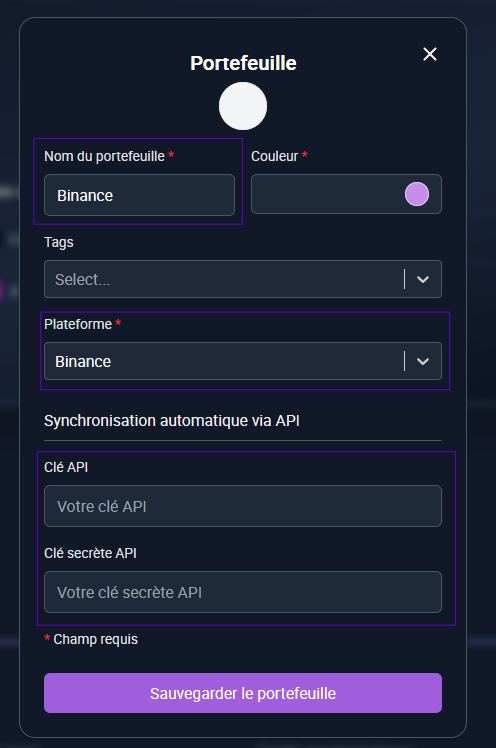
Two new fields will appear: API Key and API Secret
Copy/paste the information generated from your Mexc account (see step 1).
Click on Save and Test.
👉 If the information is correct, two new buttons will appear:
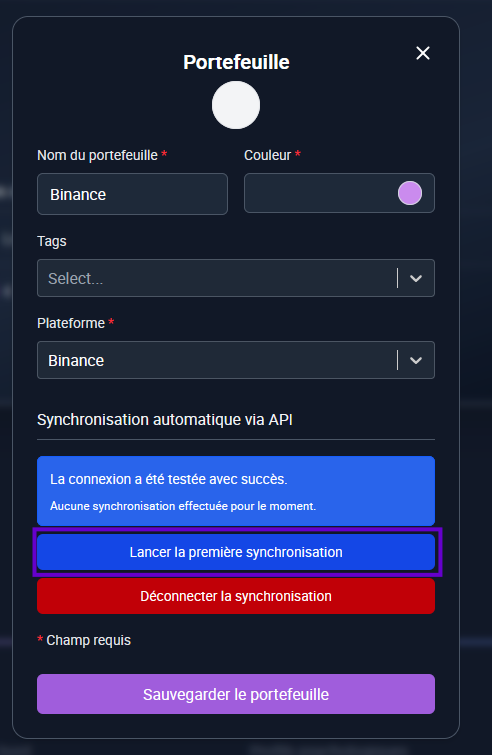
Start First Synchronization: launch the initial import of your transactions (this may take a few minutes). During the first synchronization, the cost basis (PRU) will not be filled in because Mexc does not provide this information. You will need to update your asset lines manually to enter the initial cost basis. Future transactions will be updated automatically.
A notification will be sent to you once the synchronization is complete.
Step 3: Track your transactions
Once the synchronization is complete ✅, all your Mexc transactions are imported into Exceefy.
Future transactions will also be synchronized automatically every 24h.
Don’t worry if you don’t see your latest operations right away, they will appear during the next update.